Dental Rubber Dam Kit: Clamps, Forceps, Punch and Frame Guide
Rubber dam instruments explained: clamp numbering, winged vs wingless, Brewer and Ivory forceps, punch hole sizes and frame selection.
Five components, and every one of them has a failure mode that ends with the dam coming off mid-procedure.
| Component | What it does | Common failure |
|---|---|---|
| Dam sheet | The barrier itself | Wrong thickness for the case; tears at the punch hole |
| Clamp | Anchors the dam to a tooth | Wrong number for the tooth; fatigue fracture |
| Clamp forceps | Carries and opens the clamp | Worn tips that will not hold the clamp bow |
| Punch | Makes the holes | Blunt cutting table producing a nicked hole that tears |
| Frame | Holds the dam stretched and clear | Radiopaque metal frame obstructing the working film |
Isolation is not an optional refinement in endodontics. Every major endodontic body treats dam isolation as mandatory for root canal treatment, and the medicolegal position in most jurisdictions follows the same line. Rubber dam instruments are what make that standard practical rather than aspirational.
The Sheet
Standard sheets are 6 × 6 in (152 × 152 mm) for adults and 5 × 5 in for paediatric work. Thickness is graded thin, medium, heavy, extra heavy and special heavy — in practice most operators work in medium for routine restorative and heavy for endodontics, where the extra body resists tearing at the clamp and gives better tissue retraction.
Latex remains the default. Non-latex nitrile sheets are essential stock for latex-allergic patients and for staff with sensitisation; they stretch slightly differently and tend to be less forgiving of a rough punch hole, which makes punch condition more important, not less.
Colour is not cosmetic. A dark sheet — green, blue, or the darker purples — raises contrast against tooth structure and reduces reflected light from the operating light, which matters when you are looking for a canal orifice.
Clamps: the Numbering System
Clamp numbering is inherited from the Ivory system and is broadly consistent across manufacturers, though not formally standardised. The number tells you the intended tooth and jaw shape.
| Clamp | Intended tooth | Notes |
|---|---|---|
| 00, 0, 1 | Lower incisors, small premolars | Small bow, light spring |
| 2, 2A | Premolars | 2A has a wider jaw span |
| 9 | Anterior teeth | Butterfly-shaped, low profile for cervical access |
| 212 (Ferrier) | Anterior cervical / Class V | Retracts gingiva; must be stabilised with compound |
| 7 | Mandibular molars | Inward-facing jaws |
| 8, 8A | Maxillary molars | 8A has a larger jaw span |
| W8A | Maxillary molars | Wingless version of 8A |
| 12A, 13A | Partially erupted molars, right and left | Asymmetric jaws |
| 14, 14A | Broken-down or partially erupted molars | 14A serrated for grip on a compromised crown |
| 26 | Large molars | Heavy spring |
| B4 (Brinker) | Tissue retraction, subgingival margins | Wire retractor clamp, not a load-bearing anchor |
Winged versus wingless. A winged clamp has small projections on the jaws and bow that let you mount the clamp, dam and frame together and place all three in one movement. A wingless clamp is placed on the tooth first, with the dam stretched over it afterwards. Winged is faster on a straightforward molar. Wingless gives a better view of the clamp seating and is easier when access is tight or the tooth is broken down — which is why W-prefixed clamps exist for most popular numbers.
Every clamp gets a floss ligature. Not sometimes. A clamp that fractures under load, or that is dislodged by a handpiece, is an aspiration and ingestion risk, and it happens with enough regularity that it is a recognised adverse event. A 30 cm length of floss through the bow, tied and left outside the mouth, converts that event into a retrieval.
Clamps are fatigue items. They are springs, cycled hundreds of times and autoclaved between cycles. Fracture almost always occurs at the bow, at the point of maximum bending stress, and it is preceded by visible permanent deformation — the jaws no longer meet symmetrically when the clamp is at rest. Any clamp whose jaws sit asymmetrically at rest, or that shows a bright line or surface crack at the bow, is discarded. Do not attempt to re-bend one back into shape; work-hardened stainless does not forgive that.
Clamp Forceps: Brewer, Ivory, Palmer, Washington
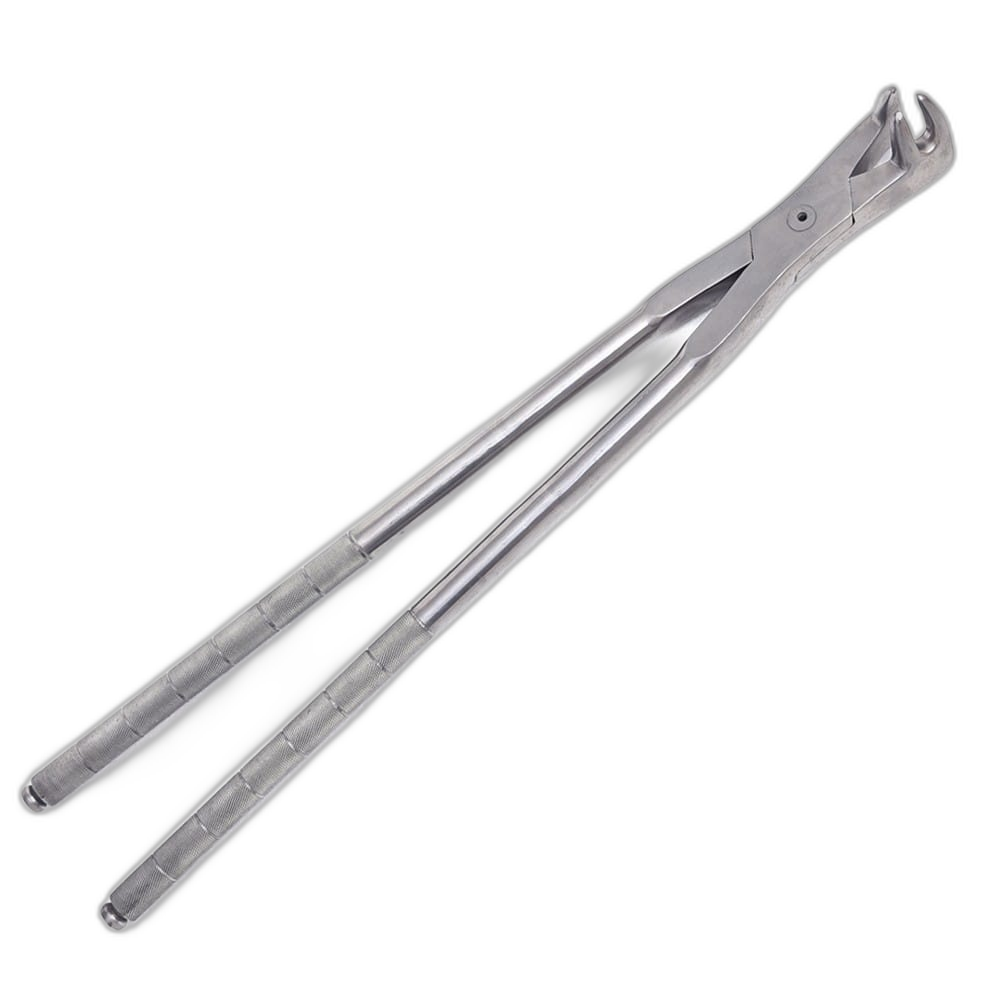
All four do the same job — engage the clamp holes, spread the jaws, carry it to the tooth, release. They differ in the geometry of the arms and the tips.
- Brewer. Bent or offset arms. The offset keeps the operator’s hand out of the sightline when placing a posterior clamp, which is the most common reason clinicians prefer it.
- Ivory (Stokes). Straight arms, ball-ended tips. The balls sit in the clamp holes positively and are less prone to slipping off a wet clamp.
- Palmer. Lighter build, finer tips, favoured for paediatric and anterior work.
- Washington. Straight arms, a simpler tip form, common in economy kits.
The functional detail that separates a good forceps from a poor one is the sliding lock. A forceps whose lock does not hold the jaws in the spread position forces you to maintain grip pressure while positioning, which is exactly when the clamp gets dropped. Test the lock on receipt: spread the arms, engage the lock, and shake the instrument. It should hold.
Tips are the wear point. Ball ends round off and flatten with use, at which point they no longer seat in the clamp hole and the clamp starts jumping off during placement. Check them under magnification at reprocessing inspection — the same principle applied to any working tip, as covered in our instrument inspection checklist.
The Punch
The punch is the component clinicians replace last and should probably replace first.
Two patterns dominate. The Ainsworth has a rotating table with five or six hole sizes and a plate-style anvil. The Ivory pattern is similar in principle with a slightly different table indexing. Both work on the same mechanism: a hardened cutting pin descends through the dam into a hole in the rotating table.
Typical hole sizes run from about 0.5 mm to 2.0 mm, commonly stepped at 0.85, 1.0, 1.3, 1.6 and 2.0 mm.
| Hole size | Use |
|---|---|
| Smallest (≈0.5–0.85 mm) | Lower incisors, deciduous anteriors |
| Small–medium (≈1.0–1.3 mm) | Upper incisors, canines, premolars |
| Medium–large (≈1.6 mm) | Molars |
| Largest (≈2.0 mm) | Clamp anchor tooth; large molars |
The failure mode is specific and worth understanding. When the cutting pin and the table hole are correctly aligned and both are sharp, the punch shears a clean circular hole with a smooth edge. Once the pin dulls, or once the pin and table fall out of alignment, the punch does not cut cleanly — it produces a hole with a small nick or tag on the circumference. That nick is a stress concentrator, and latex under tension tears from a stress concentrator every time. The dam then splits from the hole to the edge of the sheet, usually while you are seating the clamp, and the whole set-up starts again.
So: a torn dam at the punch hole is a punch problem, not a technique problem. Test the punch on a scrap of dam and inspect the hole against the light. If the circle is not clean, the instrument needs service or replacement.
Keep the punch out of the ultrasonic bath’s abrasive company and lubricate the pivot with a water-soluble lubricant. The cutting pin is the item to check; on better punches it is replaceable.
Frames
- Young frame. Metal, U-shaped, with projecting pins. Rigid, durable, holds tension well. Radiopaque — which is the reason it is removed or swapped before a working-length radiograph.
- Nygaard-Ostby frame. Plastic, radiolucent, usually oval. Stays in place through radiography, which is why it is the endodontic default.
- Visi-frame / Sauveur types. Plastic variants with hinge or clip features, some designed to fold clear of the field.
For endodontics, buy radiolucent. The two minutes saved per working-length film across a year of root canals will exceed the price difference many times over, and every frame removal is an opportunity for the seal to break.
Accessories Worth Stocking
- Wedjets / dam cord. Elastic cord stretched into the interproximal to hold the dam without a clamp — useful for anterior isolation across several teeth.
- Floss. For clamp ligatures and for inverting the dam through tight contacts. Unwaxed for inversion.
- Dam stamp and template. Speeds punching and, more usefully, makes hole spacing consistent, which reduces tearing between adjacent holes.
- Dam napkin. Reduces latex contact with the lips and absorbs saliva at the margins.
- Plastic instrument or flat plastic for inverting the dam margin into the sulcus after placement, which is what actually produces a fluid-tight seal.
Materials and Reprocessing
The metal rubber dam instruments — clamps, forceps, punches and metal frames — are AISI 420 or 410 martensitic stainless, hardened appropriately: forceps and punch cutting pins toward the harder end, clamps in a range chosen for spring behaviour rather than maximum hardness. Clamp performance depends on the temper more than on the grade — a clamp that is too hard cracks at the bow, one that is too soft takes a permanent set after a dozen cycles.
- Rinse and remove all visible debris at point of use. Composite and cement set hard on clamp jaws.
- Ultrasonic clean with the punch and forceps opened; do not leave the forceps locked.
- Inspect every clamp for symmetry at rest and for any bright line or crack at the bow. Discard, do not re-bend.
- Inspect forceps tips under magnification for rounding.
- Lubricate forceps pivot and punch mechanism with water-soluble instrument lubricant.
- Steam sterilise at 134 °C. Do not autoclave dam sheets, and do not autoclave plastic frames unless the manufacturer states they are autoclavable — many are chemical-disinfection only.
The corrosion issues on this set are ordinary and the countermeasures are the ordinary ones; if clamps are pitting or staining, the cause is usually detergent residue or wet packs rather than the steel, and the diagnostics in our guide to instrument rust and staining apply directly.
Specifying a Kit
A practical starter set for a general practice:
- Clamps: 00, 2, 2A, 9, 7, 8A, W8A, 14A, 212 — nine covers most of general practice
- One Brewer or Ivory clamp forceps
- One Ainsworth punch
- One Young metal frame and one Nygaard-Ostby radiolucent frame
- Medium and heavy sheets, latex and non-latex
Buy clamps individually rather than as a fixed block where you can. Every practice discovers within a month that it uses two or three numbers constantly and three others almost never, and the constant ones are the ones that fatigue.
Frequently Asked Questions
What is included in a rubber dam kit?
Five core items: the dam sheet, a set of clamps, clamp forceps, a hole punch and a frame. Practical kits add a dam napkin, floss for clamp ligatures and margin inversion, elastic dam cord, and a template or stamp for consistent hole spacing. Endodontic kits normally include a radiolucent frame so working-length radiographs can be taken without removing it.
What is the difference between winged and wingless clamps?
Winged clamps have projections that let you mount clamp, dam and frame together and place all three in one movement — faster on a straightforward tooth. Wingless clamps are seated on the tooth first and the dam stretched over afterwards, which gives a clearer view of clamp seating and works better on broken-down or partially erupted teeth. Many popular numbers exist in both forms, with W prefixing the wingless version.
Which punch hole size should I use?
Match the hole to the tooth: the smallest holes for lower incisors and deciduous anteriors, mid-range for upper anteriors and premolars, and the two largest for molars and the clamp anchor tooth. A hole that is too small tears; one that is too large leaks. If holes tear even at the correct size, the punch cutting pin is blunt or misaligned, not the sheet.
Why does my rubber dam keep tearing at the hole?
Nearly always a blunt or misaligned punch. A sharp punch shears a clean circle; a worn one leaves a small nick on the circumference, and latex under tension tears from that nick every time. Punch a test hole in a scrap of dam and inspect it against the light — if the circle is not clean, service or replace the punch.
Do rubber dam clamps need to be ligated with floss?
Yes, every time. Clamps fracture at the bow under load and can be dislodged by a handpiece, creating an aspiration or ingestion risk. A 30 cm floss ligature through the bow, left outside the mouth, turns a potential emergency into a simple retrieval. It costs seconds.
Can rubber dam clamps be repaired if they bend?
No. A clamp that has taken a permanent set — jaws no longer meeting symmetrically at rest — has already been overstressed, and re-bending work-hardened stainless steel accelerates fracture at the bow. Discard it. Any clamp showing a bright line or visible crack at the bow goes in the bin immediately.
Sourcing
Fizza Surgical manufactures rubber dam instruments in Sialkot under ISO 13485 with CE marking against EU MDR — the full Ivory-numbered clamp range in winged and wingless forms, Brewer and Ivory pattern forceps, Ainsworth punches, and Young frames. Clamps are supplied with a specified spring temper rather than a nominal hardness figure alone. See the dental instrument range, our guides to composite placement instruments and dental impression trays, and the certifications page for regulatory documentation.
Need precision surgical instruments?
Configure complete instrument sets with our team — ISO 13485 certified, CE marked, made in Sialkot since 1980.
Related Guides
View all articles →
Where We Serve
Fizza Surgical exports to 50+ countries. Browse our country-specific pages with local regulatory guidance and pricing:
