Bone Holding Clamps: Reduction Forceps for Fracture Surgery
Bone holding forceps compared: Lane, Lambotte, Verbrugge, Weber and Farabeuf patterns, sizes, steel grades and failure modes.
 Made in Sialkot · Since 1980
A mid-shaft femur fracture is reduced on the table, the plate is contoured, and the surgeon asks for a clamp to hold the fragments while the first cortical screw goes in. The scrub nurse hands over a Lane. Twenty seconds later the jaws skate off the periosteum and the reduction is lost.
That failure is almost never the surgeon’s fault. It is a selection problem. Lane clamps grip long, straight diaphyseal bone; they were never designed to hold an oblique fragment under rotational load. Choosing the right holding instrument is as much a part of the fixation plan as choosing the plate.
This guide covers the bone holding forceps our Sialkot workshop has forged for four decades, what each pattern actually grips well, and how to spot the failure modes before they cost you a reduction.
Holding vs. Reducing: Two Different Jobs
The terms get used interchangeably in catalogues, and that sloppiness leads to bad tray builds.
A holding instrument maintains a bone or an implant in a position that has already been achieved. It resists displacement. A reduction clamp does active work — it pulls, rotates, or compresses fragments into position against soft-tissue tension and muscle pull.
The mechanical consequence is real. A reduction instrument needs a longer lever arm and a finer ratchet so the surgeon can dial in force in small increments. A holder needs jaw geometry that maximises surface contact and a locking system that will not creep under sustained load.
Put a holder to work as a reducer and you will crush cortex. Put a reducer to work as a holder and it will drift.
The Core Patterns
Lambotte and Lane: The Diaphyseal Workhorses
Lane bone holding forceps have long, relatively straight serrated jaws and a ratchet at the ring end. They shine on transverse or short oblique fractures of dense diaphyseal bone — femur, tibia, humerus. The jaws close nearly parallel, which spreads load across a broad footprint of cortex.
Lambotte clamps take a different approach: a curved, wider jaw span that wraps around larger-diameter bone. When you are working on a proximal tibia or a bone with significant metaphyseal flare, the Lambotte seats where a Lane simply cannot reach.
Both patterns are typically forged from AISI 410 martensitic stainless. That grade takes a hardness in the 44–48 HRC range after heat treatment, which is what allows the serrations to bite dense cortex without rolling over.
Verbrugge: Plate to Bone
The Verbrugge is the clamp you reach for when the implant, not just the bone, needs holding. One jaw is a broad, flat foot that sits on the plate; the opposing jaw is a narrower hook that catches the far cortex. Squeeze, and the plate is pressed onto bone with even pressure.
The Verbrugge-Müller variant adds a longer reach for deeper exposures. If your plating tray does not include at least one Verbrugge, your surgeon is holding the plate with a finger — and fingers are radiolucent right up until they are in the way of the drill.
Pair these with the drill guides and depth gauges in a proper bone plate and screw instrument set.
Pointed Reduction Clamps (Weber)
Two sharp ball tips, a ratchet, and nothing else. The Weber clamp is the most elegant instrument in orthopaedic trauma.
The point is the whole design philosophy: minimal footprint means minimal periosteal stripping. You penetrate cortex at two small points and compress. In a spiral tibial fracture, a Weber applied perpendicular to the fracture line will close an interfragmentary gap that no serrated-jaw instrument can touch without devascularising the fragment.
Sizes generally run 130 mm, 175 mm, and 240 mm. The short one is for the malleolus and small bones of the hand; the long ones are for the femur and pelvis.
Pelvic Reduction Forceps
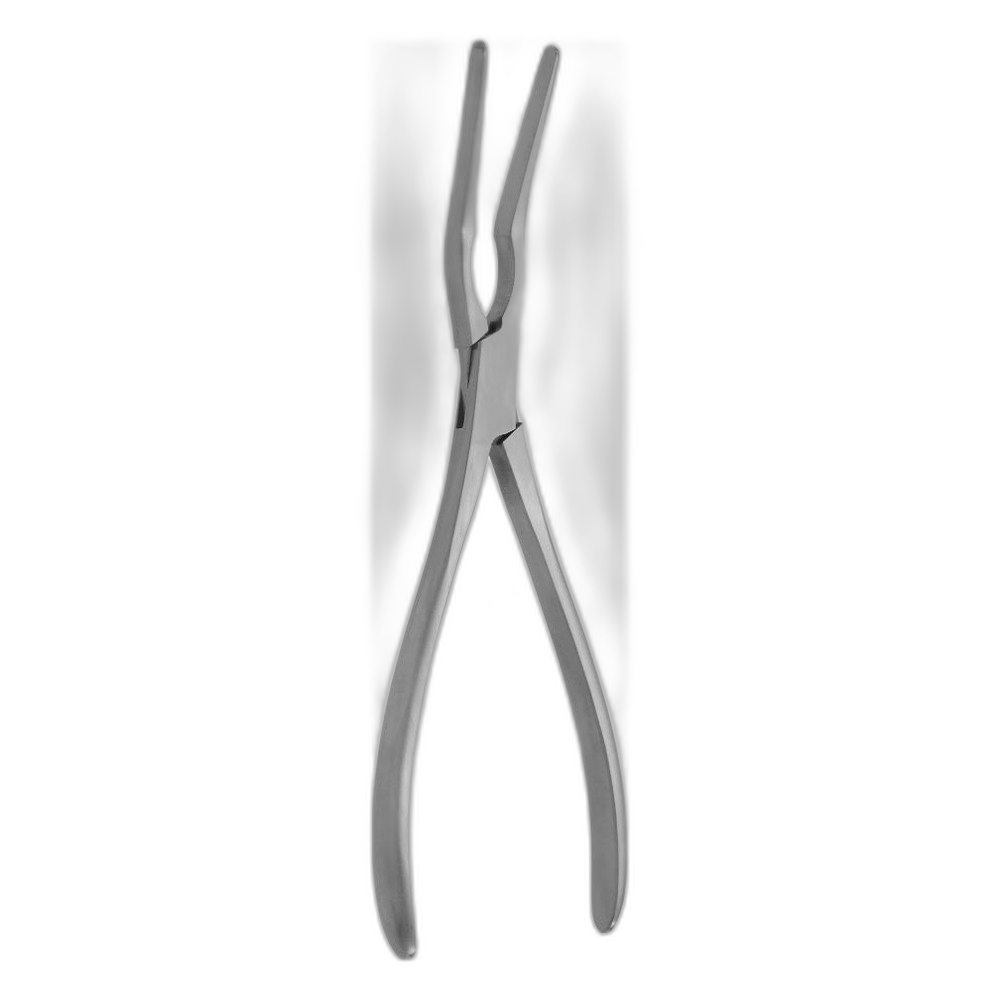
Pelvic work demands its own family. The ball-spike pusher, the asymmetric pelvic clamp, the Farabeuf with its screw-through design that grabs two 4.5 mm screw heads and levers them together — all of these exist because pelvic fragments move in three planes and cannot be held by simple jaw compression.
Farabeuf clamps have multiple teeth in the head, giving purchase on screw heads rather than on bone directly. That indirect grip is the point: you are not touching cancellous bone that would crumble under a serrated jaw.
Kern and Ulrich
Kern clamps sit between Lane and Lambotte — a moderate jaw curve, good for mobilising a fractured segment that needs alignment before definitive fixation. Ulrich clamps offer a self-centring jaw that helps on rounded bone where other patterns roll.
Specification Table
| Pattern | Typical Lengths | Jaw Type | Best Application | Locking |
|---|---|---|---|---|
| Lane | 140–320 mm | Straight serrated | Transverse diaphyseal | Ratchet |
| Lambotte | 170–280 mm | Curved, wide span | Large / metaphyseal bone | Ratchet or speed-lock |
| Verbrugge | 170–280 mm | Flat foot + hook | Plate-to-bone compression | Ratchet |
| Weber (pointed) | 130 / 175 / 240 mm | Two ball points | Spiral & oblique fractures | Ratchet |
| Farabeuf | 150–190 mm | Toothed head | Pelvic ring, screw-head grip | Screw thread |
| Kern | 150–240 mm | Moderate curve serrated | Fragment mobilisation | Ratchet |
Why the Steel Grade Decides the Lifespan
These instruments live a harder life than almost anything else on the tray. A clamp holding a femur against quadriceps tension is carrying tens of kilograms of load through two small jaw faces.
That is why cutting and gripping instruments in this class are made from martensitic grades — AISI 410 or 420 — rather than the austenitic 316L used for holloware. Martensitic steel can be hardened by heat treatment. Austenitic steel cannot; it work-hardens, but it will never hold a serration edge under this kind of load.
The trade-off is corrosion resistance. Martensitic grades have lower chromium in solution after carbide formation, which makes passivation and proper drying non-negotiable. We cover this in depth in our breakdown of stainless steel grades in surgery.
Look for these markers of a properly made clamp:
- Ratchet engagement: every tooth should catch crisply. A ratchet that skips a tooth under thumb pressure will skip under bone load.
- Jaw alignment: closed on a sheet of paper, the jaws should mark evenly along their full length. Uneven marking means the box joint is out of true.
- Tip meeting: pointed clamps must meet point-to-point, not point-past-point. A 0.5 mm offset becomes a slipped reduction.
- Surface finish: satin, not mirror. Mirror polish on an orthopaedic clamp is a glare hazard under theatre lights and tells you the maker prioritised the photograph over the surgeon.
Failure Modes Worth Knowing
Instruments in this family fail in predictable ways, and every one of them is visible on inspection before the case starts.
Serration wear. Blunted serrations are the leading cause of jaw slip. Run a thumbnail across the jaw face — you should feel distinct catch. If it feels smooth, retire the instrument.
Ratchet creep. Under sustained load a worn ratchet backs off one tooth at a time. You will not see it happen; you will only notice the gap has reopened when you take the fluoro shot.
Box joint play. Hold the instrument closed and try to rock the jaws laterally. Any perceptible play means the joint has worn, and jaw alignment is gone with it.
Point deformation. On Weber clamps, the ball points blunt or bend. A rounded point does not penetrate cortex; it slides along it.
Stress corrosion cracking. The one that matters most. Chloride exposure plus tensile load equals cracking at the box joint. Saline left on an instrument overnight is the classic cause. This is why the sequence in our orthopaedic instrument sterilization protocol insists on immediate rinsing.
Care Between Cases
The ratchet and box joint are where these instruments die.
Rinse under cool running water immediately after use — cool, because hot water coagulates protein onto the serrations. Open the ratchet fully and immerse in a pH-neutral enzymatic solution. Never leave a hinged instrument locked closed in a soak; the joint is where soil hides and the closed position seals it in.
Brush the serrations along the groove direction with a soft nylon brush. Cross-brushing packs debris deeper. Never use a wire brush on a serrated face.
Ultrasonic cleaning is appropriate for this class — unlike delicate microsurgical tips — and the jaws must be open in the basket. Follow with instrument milk on the box joint and ratchet, then steam sterilise. A standard prevacuum cycle at 134 °C for 3 minutes handles these instruments; open the ratchet to the first tooth so steam reaches the joint surfaces.
Dry completely. A clamp put away damp is a clamp with a pit forming in the box joint.
Building the Tray
A functional trauma set does not need every pattern ever forged. It needs coverage of the mechanical situations you actually meet.
For a general long-bone plating tray, the practical minimum is: two Weber clamps (one 175 mm, one 240 mm), one Verbrugge, one Lane or Lambotte sized to the bone, and one small pointed clamp for the malleolar work that always turns up. Add pelvic patterns only if you do pelvic work — they are expensive, and they sit unused otherwise.
Browse the full range of bone surgery instruments, or review our certifications for CE marking and ISO 13485 documentation.
Frequently Asked Questions
What is the difference between bone holding forceps and a reduction clamp?
A holding clamp maintains a position already achieved and resists displacement through broad jaw contact. A reduction clamp actively moves fragments into position against muscle tension, which requires a longer lever arm and finer ratchet control. Using one for the other’s job leads to crushed cortex or lost reductions.
Which clamp is best for a spiral fracture?
A pointed reduction clamp of the Weber type. Its two ball tips penetrate cortex at minimal points, closing the interfragmentary gap without stripping periosteum. Serrated-jaw patterns applied to a spiral fracture devascularise the fragment across a much larger footprint.
Can these instruments be ultrasonically cleaned?
Yes, and they should be. Unlike microsurgical instruments with delicate tips, orthopaedic clamps are robust enough for ultrasonic cavitation. The jaws and ratchet must be fully open in the basket so the cleaning solution reaches the box joint.
Why do the jaws slip even though the clamp is new?
Usually a pattern mismatch rather than a defect. Straight-jaw patterns skate on curved or oblique surfaces because contact reduces to a line rather than a face. Check that the jaw curvature matches the bone geometry before assuming the instrument is at fault.
What steel grade should orthopaedic clamps be made from?
Martensitic stainless, typically AISI 410 or 420, hardened to roughly 44–48 HRC. These grades hold a serration edge under load. Austenitic grades such as 316L cannot be hardened by heat treatment and are used for holloware and implants, not for gripping instruments.
Need precision surgical instruments?
Configure complete instrument sets with our team — ISO 13485 certified, CE marked, made in Sialkot since 1980.
Related Guides
View all articles →
Where We Serve
Fizza Surgical exports to 50+ countries. Browse our country-specific pages with local regulatory guidance and pricing: