Tighten a cortical screw through the angled hole of a dynamic compression plate and something mechanical happens that defines modern fracture surgery: as the screw head slides down the inclined ramp of the hole, the bone fragment is dragged toward the fracture line. A 4.5 mm DCP hole is machined to allow roughly 1 mm of horizontal travel per screw. Place two compression screws and you can load a transverse fracture with controlled inter-fragmentary pressure—the foundation of primary bone healing.
None of that geometry helps if the instruments driving the hardware are imprecise. Plating is a system: the plate and screws are the implant, but the drill guides, taps, depth gauges, screwdrivers, and bending tools are what convert a fractured bone into a stable construct. This guide walks through the bone plating instruments that make up that system.
The Core Plating Instrument Set
A general fracture-fixation tray is organised around the screw-insertion cycle: drill, measure, tap, insert. Each step has a dedicated instrument, and the tolerances between them are tighter than most people realise.
Drill guides and sleeves
The drill guide is what makes a compression plate work. Double-ended neutral and load guides—often colour-coded green for neutral and gold for compression—position the drill bit either centred in the plate hole or offset roughly 1 mm away from the fracture. That offset is the entire mechanism: drilling eccentrically lets the screw head ride down the ramp and pull the fragment in. Threaded guides for locking systems thread directly into the plate hole to keep the bit perfectly perpendicular, which is non-negotiable for a fixed-angle locking screw.
Drill bits and taps
Drill bits are sized to the screw core, not its thread: a 3.5 mm cortical screw is drilled with a 2.5 mm bit for the pilot (thread) hole and a 3.5 mm bit for the gliding hole in lag technique. Taps cut the thread profile ahead of the screw in dense cortical bone, reducing insertion torque and the risk of the screw stripping. Self-tapping screws have flutes that do this work during insertion, but a tap is still kept on the tray for hard diaphyseal bone.
Depth gauge
After drilling, the depth gauge hooks the far cortex and reads screw length directly off the calibrated barrel. A screw 2 mm too short loses purchase in the far cortex; one too long irritates soft tissue and, near a joint, can be catastrophic. This small instrument prevents both.
Screwdrivers and torque limiters
Hexagonal, cruciform, and Stardrive (star) tips drive the screws. In locking systems a torque-limiting attachment—commonly set to 1.5 Nm for 3.5 mm locking screws or 4 Nm for larger sizes—mates with the screwdriver so the surgeon cannot cold-weld the screw head into the threaded plate hole. Over-torquing a locking screw is one of the few errors that turns routine hardware removal into a drilling exercise.
Plate-handling instruments
Plate-bending presses and irons contour the plate to the bone surface before fixation; bending pliers and bending templates let the surgeon pre-shape malleable templates against the bone, then mirror that shape onto the implant. Plate-holding forceps clamp the plate to the bone, and articulated tension devices apply axial compression across a fracture beyond what eccentric drilling alone provides.
Fragment Sizes and Screw Systems
Plating hardware is grouped by fragment size, and the instruments scale with it. Matching the right tray to the bone is the first decision in any plating case.
| System | Screw sizes | Pilot drill | Typical use |
|---|---|---|---|
| Mini fragment | 1.5 / 2.0 / 2.4 mm | 1.1–1.8 mm | Hand, foot, face |
| Small fragment | 2.7 / 3.5 mm | 2.0–2.5 mm | Forearm, distal fibula, clavicle |
| Large fragment | 4.5 / 5.0 mm | 3.2 mm (core) | Femur, tibia, humerus |
| Cancellous screws | 4.0 / 6.5 mm | 2.0–3.2 mm | Metaphyseal / epiphyseal bone |
Cortical screws have a fine, fully threaded profile for dense diaphyseal bone; cancellous screws carry a coarse, deep thread—often partially threaded—to grip soft metaphyseal bone and generate compression across a fracture as a lag screw. The instrument that distinguishes them in practice is the tap, because cancellous bone is frequently left untapped to preserve thread grip.
Locking vs Compression Plating: An Instrument Perspective
The shift from conventional compression plating to locking plate technology changed the instruments more than the implants. A conventional plate relies on friction—the screw presses the plate hard against the bone, and that compression resists movement. A locking plate works like an internal fixator: the screw threads lock into the plate hole at a fixed angle and the construct does not depend on plate-to-bone pressure at all.
That single difference cascades through the tray. Locking systems require threaded drill guides to guarantee perpendicular trajectory, torque-limiting drivers to seat the locking head without stripping it, and they tolerate—indeed prefer—the plate sitting slightly off the bone to protect periosteal blood supply. Conventional plating needs precise contouring with bending presses because a poorly bent plate pulls the fracture out of alignment as the screws are tightened. Many modern plates are combi-hole designs accepting both screw types, so most well-equipped trays now carry both guide sets.
Materials and Manufacturing Standards
Plating instruments take repeated high-torque loads and impact from mallets on bending irons, so material selection is unforgiving. Cutting and gripping instruments—drill guides, forceps, screwdriver shafts—are typically forged from martensitic stainless grades such as AISI 410 or 420 and hardened for edge and wear resistance. Implant-grade screws and plates themselves are made from 316L stainless or titanium alloy (Ti-6Al-4V), but the reusable instrumentation is steel.
Dimensional accuracy is the quality that separates a usable set of bone plating instruments from a dangerous one. A drill guide whose sleeve has worn even a tenth of a millimetre lets the bit wander, and a screwdriver tip that no longer matches the screw recess will cam out under load. Fizza Surgical manufactures its orthopaedic instruments under an ISO 13485 quality system with CE marking, holding the machining tolerances that fixed-angle locking technology demands. The same standards govern our wider bone surgery instruments range.
Care, Inspection, and Common Failures
Drill bits and taps are the consumables of the orthopaedic tray. A dull bit overheats bone—the same thermal-necrosis risk seen in implant dentistry—and a worn tap leaves a ragged thread the screw cannot grip. Inspect cutting flutes under magnification after every cycle and retire on wear, not on appearance.
Screwdriver tips deserve equal attention. A cammed-out hex tip is the single most common cause of an intra-operative stripped screw, which can convert a clean fixation into a prolonged extraction. Check tips against a reference screw periodically. After cleaning, plating instruments follow the standard critical-instrument pathway: enzymatic pre-soak, ultrasonic cleaning, lubrication of articulated joints and ratchets, then steam sterilisation at 134 °C. Cannulated instruments and drill guides need brush-through cleaning of their lumens, because retained bone slurry both harbours bioburden and clogs the next case’s drill.
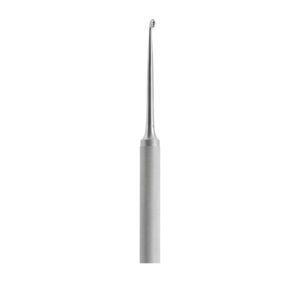
Periosteal elevators and bone-contact instruments used to expose the fracture overlap with the spine and general orthopaedic trays—the same family as a Cobb periosteal elevator or a bone osteotome and chisel set—so many of these instruments are shared across an orthopaedic department rather than dedicated to plating alone.
Frequently Asked Questions
What is the difference between a neutral and a load drill guide?
A neutral (green) guide centres the drill bit in the plate hole; a load or compression (gold) guide offsets the bit about 1 mm away from the fracture. Drilling eccentrically with the load guide lets the screw head slide down the ramped hole and compress the fracture as it tightens.
Why do locking screws need a torque limiter?
A locking screw threads into the plate hole at a fixed angle. Over-tightening cold-welds the head into the plate, making later removal extremely difficult. A torque-limiting attachment—typically 1.5 Nm for 3.5 mm locking screws—stops insertion at the correct point.
Do cancellous screws need a tap?
Usually not. Cancellous bone is soft enough that tapping can reduce thread grip, so cancellous screws are often inserted untapped. Dense cortical bone, by contrast, is normally pre-tapped unless self-tapping screws are used.
What drill bit size is used for a 3.5 mm cortical screw?
A 2.5 mm bit drills the threaded pilot hole. In lag technique the near cortex is over-drilled with a 3.5 mm bit to create a gliding hole so the screw compresses the fragments.
Can one plate accept both locking and compression screws?
Yes. Combi-hole plates have hybrid holes—one part threaded for locking screws, one part ramped for compression screws—letting the surgeon mix fixation strategies along a single plate.
Specifying a Plating Set
A department building or replacing a fracture tray should match the system to its caseload first—mini and small fragment for upper-limb and ankle trauma, large fragment for femoral and tibial work—then ensure the instrument side is complete: both guide types, a full drill and tap range, accurate depth gauges, torque-limiting drivers, and proper plate-contouring tools. The implants get the attention, but it is the instruments that determine whether the construct goes in clean. Fizza Surgical produces this instrumentation to ISO 13485 and full CE-marked standards, and our engineering team can specify a set against the plate systems your theatre already stocks.
Where We Serve
Fizza Surgical exports to 50+ countries. Browse our country-specific pages with local regulatory guidance and pricing: