Total Knee Replacement Instrument Set: TKA Tools Guide
Knee replacement instruments explained: implant-specific TKA jigs vs the basic knee tray, a 40-piece tray list, sizes, steel grades and CSSD tips.
A primary total knee arthroplasty usually goes through somewhere between five and ten trays, depending on the implant system and how the hospital packs it. It surprises procurement teams the first time they cost a knee programme: most of that weight is not implant-specific at all.
Knee replacement instruments fall into two groups. The implant company supplies the cutting blocks, alignment guides, sizers and trials, often as loaner sets, because those parts are made for one implant geometry. The hospital owns everything else: the retractors, bone levers, spreaders, rongeurs, osteotomes, curettes, mallets and clamps that make up the basic knee tray. That second group gets used on every case, gets reprocessed hundreds of times, and is where good buying decisions save money.
This guide walks through a TKA the way the scrub nurse sees it, stage by stage, then sets out a practical basic tray list with sizes and steel grades.
Two Halves of the Knee Set
| Group | Typical contents | Who supplies it | Interchangeable between systems? |
|---|---|---|---|
| System instruments | Intramedullary rod, distal femoral cutting guide, AP sizer, 4-in-1 cutting block, tibial alignment guide and cutting block, stylus, trials, patellar reamer or clamp, implant impactors | Implant manufacturer, usually on loan or consignment | No |
| Basic knee tray | Retractors, Hohmann levers, lamina spreaders, bone hooks, rongeurs, osteotomes, curettes, mallet, towel clips, clamps, scissors, needle holders | Hospital-owned, from an instrument manufacturer | Yes |
| Power and consumables | Oscillating saw, drill, saw blades, pins, pulsatile lavage, cement mixing system | Mixed | Partly (blade hub fittings vary) |
Keeping that split in mind prevents a common mistake: trying to buy a “complete TKA set” from a general instrument maker. No honest supplier can copy the cutting jigs for a branded implant, and a hospital should not want them to. What an instrument manufacturer can do well is the basic tray.
Exposure: Tourniquet, Arthrotomy and Retraction
Most surgeons still inflate a thigh tourniquet for at least part of the case, though practice varies. Our guide to the pneumatic tourniquet and Esmarch bandage covers cuff pressure and timing.
The standard approach is a midline skin incision followed by a medial parapatellar arthrotomy. A No. 10 or No. 20 blade on a No. 4 handle opens the skin; a second knife, curved Mayo scissors and toothed forceps take the capsule. Then the retraction work starts, and this is where the basic tray earns its place.
- Hohmann retractors go around the tibia medially and laterally to lift the soft tissue away from the tibial cut. A set usually includes both narrow (around 16–18 mm tip) and broad (around 24 mm) blades, plus bent patterns for the lateral side. Our Hohmann retractor guide compares the tip widths.
- Posterior cruciate (PCL) retractor or a curved “tibial pusher” lever sits behind the tibia and pulls it forward so the tibial plateau comes into view.
- Z-retractors protect the collateral ligaments during the femoral and tibial cuts.
- Langenbeck and Army-Navy retractors hold skin and subcutaneous tissue during the approach and closure.
- Patellar retractors or a blunt rake move the everted or subluxed patella out of the way.
Retractors in a knee tray take a lot of leverage. Bent Hohmanns in particular see high bending loads at the neck. They should be made from hardened martensitic stainless, typically AISI 420, and a buyer should check that the blade does not flex visibly under hand pressure. Soft retractors bend over months and then start to crack at the bend.
The Femoral Cuts
The distal femur is usually prepared first. A drill of about 8–9 mm opens the medullary canal just anterior to the PCL insertion, and an intramedullary rod is passed up the femur to set the anatomical axis. A distal femoral cutting guide is attached to the rod at a set valgus angle, commonly 5–7 degrees, and pinned to the bone.
The oscillating saw makes the distal cut through the slot. The guide comes off, an AP sizing guide measures the femur, and the matching “4-in-1” cutting block is pinned in place to make the anterior, posterior and two chamfer cuts. The rotation of that block, usually referenced to the posterior condyles or the transepicondylar axis, is one of the decisions that affect patellar tracking later.
Almost every item in that sequence belongs to the implant system. What the basic tray adds:
- A heavy pin puller or pin extraction forceps to remove the fixation pins cleanly.
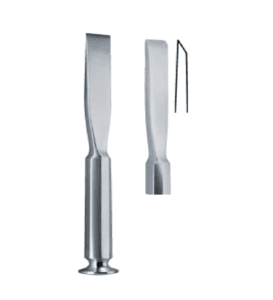
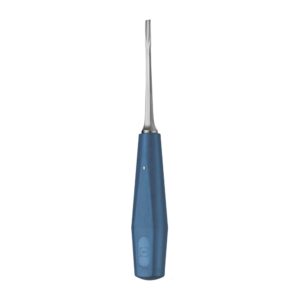
- Straight osteotomes, 10–20 mm, to finish cuts the saw can’t reach, especially posterior condyle fragments.
- A curved osteotome and bone hook to lift out the posterior condyle offcuts and remove posterior osteophytes.
- Kocher forceps to grasp bone fragments and meniscal remnants.
The Tibial Cut
The tibial cut uses either an extramedullary guide, which clamps above the ankle and lines up with the tibial shaft, or an intramedullary rod. The cutting block sits on the proximal tibia with a built-in or adjustable posterior slope, often 3–7 degrees depending on the implant design. A stylus sets the depth of resection, commonly about 8–10 mm from the less worn side.
Before the saw goes in, the tray has to clear the view. Hohmann retractors go medially and laterally, the PCL retractor goes behind. After the cut, a Leksell or double-action rongeur trims osteophytes around the rim, and curettes remove remnants of the menisci and cruciate stumps. A large bone hook or Kocher lifts out the resected plateau.
This is also where the lamina spreader first appears. Placed between femur and tibia with the knee flexed, it opens the posterior space so the surgeon can clear posterior osteophytes and remaining meniscus.
Balancing and Trials
Once the main cuts are done, the surgeon checks the flexion and extension gaps. Spacer blocks and trial components from the implant system show whether the gaps are equal and rectangular. If they are not, soft tissue releases follow: a periosteal elevator along the medial tibia, a knife or scissors for posterior capsule work, and sometimes pie-crusting with a needle.
Useful basic tray items at this stage:
- Two lamina spreaders, one smooth-jawed and one toothed, around 30–35 mm jaw opening.
- A Cobb elevator (about 13–19 mm) and a periosteal elevator for medial release.
- A ruler or depth gauge to check resection thickness, for instance on the patella.
The patella is resurfaced in many but not all cases. A patellar clamp holds the bone while the articular surface is cut or reamed, typically leaving around 12–15 mm of bone, and drill guides prepare the peg holes for the button. Some of those tools are system-specific; a simple patella holding forceps and calipers belong on the basic tray.
Cementing and Implant Insertion
Most primary knees are cemented. The bone ends are cleaned with pulsatile lavage and dried. Cement is mixed, applied to bone and implant, and the components are impacted: tibia first on most systems, then femur, then the polyethylene insert and patella.
The implant impactors are part of the system, but the mallet usually comes from the basic tray. A 500–700 g orthopaedic mallet with a replaceable nylon or polymer face works for most knees. Our guide to bone impactors, tamps and mallets explains the weight and face options.
Excess cement comes off with a small curette, a Freer elevator or a dedicated cement curette while it is still doughy. Hard cement left behind in the posterior knee is a common source of pain and polyethylene wear, so a bent or angled curette that reaches behind the femoral component is worth having.
A Practical Basic Knee Tray
Every hospital builds its own list around its surgeons, but a representative basic tray for knee arthroplasty looks something like this:
| Instrument | Qty | Typical size / pattern | Material |
|---|---|---|---|
| Scalpel handle No. 4 | 2 | For No. 20–23 blades | AISI 410/420 |
| Mayo scissors, curved | 1 | 170 mm | AISI 420 |
| Metzenbaum scissors | 1 | 180 mm | AISI 420 |
| Dissecting forceps, toothed | 2 | 160 mm | AISI 420 |
| Kocher forceps, straight | 4 | 180 mm | AISI 420 |
| Towel clips, Backhaus | 6 | 130 mm | AISI 420 |
| Hohmann retractors, narrow and broad | 4 | 16–24 mm tips, incl. 1 bent | AISI 420, hardened |
| PCL / tibial retractor | 1 | Curved lever | AISI 420 |
| Z-retractors | 2 | Medium | AISI 420 |
| Langenbeck retractors | 2 | Medium blades | AISI 420 |
| Lamina spreaders | 2 | Smooth and toothed | AISI 420 |
| Bone hook, large | 1 | Single sharp | AISI 420 |
| Leksell rongeur | 1 | Double action, curved | AISI 420 |
| Osteotomes, straight | 3 | 10, 15, 20 mm | AISI 420, hardened edge |
| Curved osteotome | 1 | 15 mm | AISI 420 |
| Curettes | 3 | Sizes 0, 2, 4, incl. 1 angled | AISI 420 |
| Cobb elevator | 1 | 19 mm | AISI 420 |
| Freer elevator | 1 | Double ended | AISI 420 |
| Orthopaedic mallet | 1 | 500–700 g, nylon face | Stainless body |
| Pin extraction pliers | 1 | Heavy pattern | AISI 420 |
| Needle holders, Mayo-Hegar | 2 | 180 mm, TC inserts optional | AISI 420 / TC |
| Ruler and calipers | 1 each | 150 mm ruler | AISI 304 |
That list totals roughly 40–45 pieces. Many hospitals split it across a soft-tissue tray and an orthopaedic tray to keep each under the weight limits discussed below. If the same department runs hips, a large share of the tray overlaps with the hip replacement instrument set, and some hospitals standardise one “arthroplasty basic tray” for both.
Unicompartmental and Revision Knees
Not every knee on the list is a primary TKA, and the basic tray has to stretch to cover the others.
Unicompartmental knee replacement works through a shorter incision, often without everting the patella. Narrower instruments help: slim Hohmanns around 12–16 mm, a smaller lamina spreader, and a narrow curved osteotome to clear the intercondylar notch. Some hospitals keep a slim “uni” add-on tray rather than overloading the standard one.
Revision knees are a different job. Before any new cut, the old components and cement have to come out. That calls for thin flexible osteotomes to work along the implant–cement interface, a Gigli saw or narrow saw blades behind the femoral component, slap hammers and extractors, long cement chisels and reverse curettes for the canal. Much of the extraction kit is sold separately as a revision set. The hospital-owned part of that set benefits from the same rules as the basic tray: hardened edges, known patterns, and single-item replacement when a thin osteotome bends.
Revision cases also run longer and use more instruments per case, so trays come back to the CSSD with heavier bone and cement contamination. Plan the reprocessing capacity along with the instruments.
Reprocessing: Where Knee Trays Cause Trouble
Arthroplasty trays are among the hardest sets a CSSD handles. Three issues come up again and again.
Tray weight. AAMI ST77 and many hospital policies cap a sterilised container at about 11.3 kg (25 lb) including the instruments. Heavier trays condense more water during the steam cycle, dry poorly, and come out of the autoclave as “wet packs” that must be reprocessed. Splitting a heavy knee set into two lighter trays is almost always cheaper than re-running wet loads.
Cannulated and slotted parts. Intramedullary rods, cannulated drills and the saw slots in cutting blocks trap bone debris and cement. They need brushing with the correct diameter brush, flushing, and ultrasonic cleaning before the washer-disinfector. A cutting slot packed with dried bone paste will not sterilise reliably.
Wear on cutting surfaces. Saw slots wear with every case. A worn slot lets the blade wander and can shed metal debris into the joint. That problem belongs to the implant company for loaner jigs, but the hospital should report it. For hospital-owned items, check osteotome edges, rongeur jaws and Hohmann tips at every assembly, and send them for sharpening or repair on a schedule rather than when they fail.
Buying Knee Replacement Instruments for the Basic Tray
When sourcing the hospital-owned half of a TKA set, these points matter more than the unit price:
- Hardness on levers and cutting edges. Hohmanns and osteotomes should be heat-treated AISI 420, typically in the region of 50–55 HRC for edges. Ask what hardness the maker targets.
- Consistent patterns. If the tray replaces an existing set, send samples or drawings so blade widths, bends and lengths match what the surgeons already use.
- Laser marking. Permanent part numbers and UDI marking make tray assembly and tracking easier across hundreds of cycles.
- Certification. ISO 13485 manufacturing and CE marking under EU MDR are the baseline for tenders. Our certifications page lists ours.
- Repair and replacement. A basic knee tray lives for years. Confirm that single instruments can be reordered in the same pattern.
Fizza Surgical manufactures the general orthopaedic instruments that make up the basic tray: retractors, levers, spreaders, rongeurs, osteotomes, curettes and mallets. Browse the bone surgery instruments range, or send your existing tray list for a matched quotation. We do not reproduce implant-specific cutting jigs or trials.
Frequently Asked Questions
What instruments are used in a total knee replacement?
A TKA uses implant-specific instruments such as intramedullary rods, femoral and tibial cutting blocks, sizers and trial components, plus a basic tray of retractors, Hohmann levers, lamina spreaders, rongeurs, osteotomes, curettes, a mallet and soft-tissue instruments.
Can a hospital buy TKA cutting blocks from any manufacturer?
No. Cutting blocks, alignment guides and trials are designed for one implant geometry and come from the implant company, usually on loan. The basic knee tray, however, can be bought from any qualified instrument manufacturer.
How many trays does a knee replacement need?
Commonly five to ten, depending on the implant system and how the hospital splits the basic tray. Keeping each tray under about 11.3 kg helps avoid wet packs after steam sterilisation.
Which retractors are used in knee arthroplasty?
Hohmann retractors around the tibia, a PCL or tibial retractor behind it, Z-retractors to protect the collateral ligaments, and Langenbeck or Army-Navy retractors for skin and subcutaneous tissue.
What steel are knee replacement instruments made from?
Most reusable orthopaedic instruments are made from hardened martensitic stainless steel, usually AISI 410 or 420. Cutting edges and levers are heat-treated for hardness, while rulers and some non-cutting parts may use AISI 304.
Need precision surgical instruments?
Configure complete instrument sets with our team — ISO 13485 certified, CE marked, made in Sialkot since 1980.
Related Guides
View all articles →

Where We Serve
Fizza Surgical exports to 50+ countries. Browse our country-specific pages with local regulatory guidance and pricing: